
Taking down a wall mount from your apartment can leave behind holes that you’ll need to repair before moving out. Whether it’s from a TV mount, shelf, or other fixture, these holes need proper attention if you want to get your security deposit back. The good news? You can handle most wall mount holes yourself without calling a professional.
Fixtman is here to help you understand the repair process. This guide walks you through everything you need to know about removing wall mounts and fixing the damage they leave behind. We’ll cover the tools you need, the step-by-step process, and special cases you might encounter in older apartments.
Types of Wall Mount Damage
Hole Size and Severity
Wall mount holes vary in size and severity depending on what was mounted and how long it was there. Small screw holes might only be a quarter inch wide, while anchor holes can be larger and require different repair approaches.
Simple Puncture Holes
Some mounts create simple puncture holes that are easy to fill. These types of damage are typically the most straightforward to repair and require minimal effort.
Cracked and Stripped Drywall
Others leave behind cracked drywall or stripped areas where anchors have pulled away from the wall. This type of damage requires more extensive repair methods compared to simple holes.
How to Remove Holes in Apartment
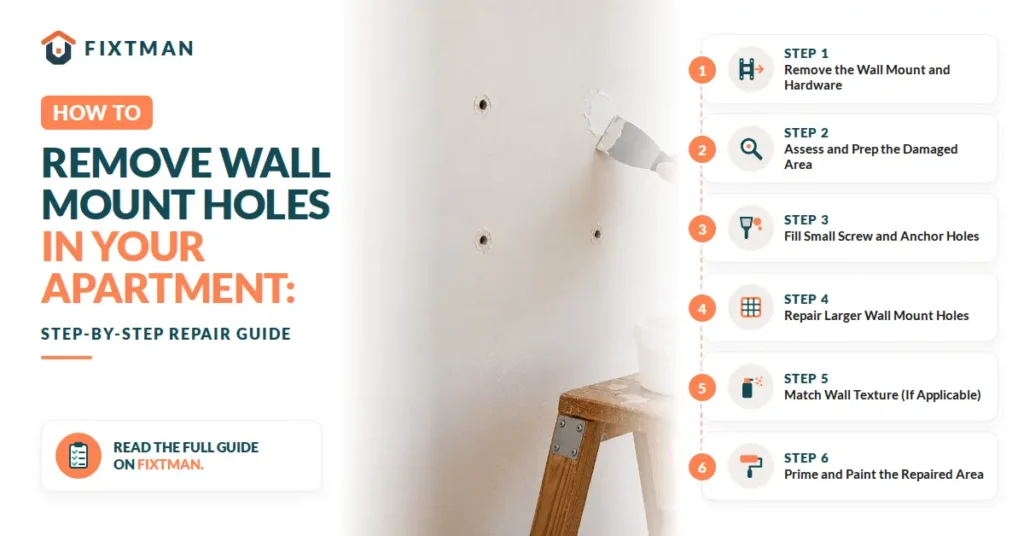
Safely Remove the Wall Mount and Hardware
Start by disconnecting any cables or wires attached to your mount. Turn off the power if it’s an electronic device to stay safe. Then use your drill or screwdriver to remove all mounting hardware from the wall.
Some mounts are bolted directly into studs, while others use drywall anchors. Check the back of the wall if possible to understand what’s holding the mount. Take your time during removal and work slowly to avoid creating larger holes or damaging surrounding drywall.
Assess and Prep the Damaged Area
Once the mount is off, take a close look at what’s left behind. You might see small screw holes, anchor holes, or areas where the wall surface has cracked. Clean the area around the holes with a damp cloth to remove dust and debris.
Let the wall dry completely before starting repairs. This usually takes about 15 minutes for a damp cloth application. A dry surface helps spackle and joint compound stick better, giving you stronger repairs.
| Hole Type | Typical Size | Recommended Repair |
| Screw holes | 1/8 inch | Spackling compound |
| Anchor holes | 1/4 to 1/2 inch | Spackling or joint compound |
| Cracked drywall | 1 to 2 inches | Joint compound and tape |
| Stripped areas | 2+ inches | Drywall patch kit |
Fill Small Screw and Anchor Holes
For holes smaller than a quarter inch, spackling compound is your best friend. It dries fast and shrinks minimally, which means fewer touch ups. Spread it with your putty knife, overfilling the hole slightly since it will shrink as it dries.
Smooth the surface with your putty knife held at a low angle. Wipe away excess with a damp cloth before it fully dries. Once completely dry (check the can for timing, usually 1 to 3 hours), sand lightly with 220 grit sandpaper until smooth.
Repair Larger Wall Mount Holes
Holes between a half inch and two inches need joint compound instead of spackle. It’s thicker and stronger than spackle, making it better for medium damage. Apply it in thin layers, allowing each layer to dry completely before adding more.
Use a wider putty knife for these repairs, around 4 to 6 inches wide. Feather the edges outward so the compound blends smoothly with the surrounding wall. Most medium holes need two to three coats to match the wall surface completely.
Match Wall Texture (If Applicable)
Many apartments have textured walls that need to match the repair. If you skip this step, your patch will look obvious and might affect your deposit. Check if your landlord has leftover texture spray, or bring a photo to the hardware store to match it.
Test your texture spray on cardboard first to get the pattern right. Apply it carefully to the repaired area once the joint compound is completely smooth. Let it dry fully before any painting or further work.
Prime and Paint the Repaired Area
Even if your wall is white, you need primer on the repaired area. Primer seals the joint compound and helps paint stick properly. Without it, the repaired section often looks dull and flat compared to the rest of your wall.
Use a small brush or foam applicator to paint a thin coat of primer over the repair. Let it dry per the instructions on your primer can. Then apply your wall color, and you might need a second coat for perfect coverage.
| Repair Size | Drying Time | Coats Needed | Total Time |
| Small (under 1/4 inch) | 1 to 3 hours | 1 spackle | 4 to 5 hours |
| Medium (1/4 to 2 inches) | 12 to 24 hours | 2 to 3 compound | 1 to 2 days |
| Large (2+ inches) | 24 hours | Patch kit plus paint | 2 to 3 day |
Special Cases
Repairing Holes in Plaster (Older Apartment Buildings)
Plaster walls are common in older apartments and need different handling than drywall. Plaster is harder and less forgiving, so repairs look different. You can’t use regular drywall spackle successfully on plaster because it won’t adhere well.
Buy plaster patching compound specifically made for this material. It bonds to plaster much better than drywall products. The application method is similar, but plaster repairs often need more coats and longer drying times between applications.
Fixing Cracked Drywall Around a Mount
Sometimes mounting hardware creates cracks that radiate outward from the hole. These cracks are structural stress marks from the weight of the mount. They require careful attention to prevent future cracks from spreading.
Use mesh drywall tape over the cracks, then apply joint compound over the tape. This reinforces the repair and prevents the cracks from reopening. Sand smooth once dry and apply primer and paint as usual.
Removing and Patching Multiple Holes from a Repositioned Mount
If your wall mount was moved once or twice, you might have multiple hole sets. You could fill each one individually, or patch a larger area if they’re close together. Patching a larger section often looks better than having several visible filled holes.
For multiple holes within a few inches of each other, use a drywall patch kit to cover the entire damaged area. This creates a seamless repair that blends naturally into your wall.
Dealing with Stripped or Oversized Holes
Stripped holes happen when drywall anchors pull away from the wall, leaving large ragged holes. These aren’t suitable for simple spackling because the damage is too severe. A drywall patch kit designed for oversized holes is your answer.
These kits have adhesive backing and come with all supplies needed. They seal the damaged area and create a solid base for joint compound. Once the kit is installed, treat it like any other drywall repair.
When to Call a Professional Instead of DIY
Most wall mount holes can be repaired successfully at home, but some situations require professional help. If you encounter severe structural damage, multiple large holes, or water damage, contact a professional. Fixtman can connect you with certified repair specialists in your area who handle complex apartment repairs.
You should also call a professional if you’ve attempted repairs and the wall still looks noticeably different from the rest of the surface. Professional painters have color matching tools and experience that home repairs often lack. Getting it right saves your security deposit and maintains your apartment’s appearance.
Conclusion
Properly repairing wall mount holes is essential for protecting your security deposit when moving out. By taking time to address the damage and following the repair methods outlined in this guide, you can restore your apartment and ensure it’s in good condition for the next tenant. If you need help with more complex repairs, Fixtman’s network of qualified professionals is ready to assist you.

Frequently Asked Questions
Will My Landlord Notice Filled Nail or Screw Holes?
No, properly filled and painted small holes blend seamlessly into the wall and are not noticeable.
Can I Use Toothpaste or Soap Instead of Spackle?
These temporary fixes don’t work well and create visible patches; always use proper spackle or joint compound.
How Many Holes Are Considered “Normal Wear and Tear”?
Typically a few small holes from standard fixtures are acceptable, but large or multiple holes may result in deductions.
Does Filling Holes Guarantee I Get My Full Deposit Back?
Proper repairs help, but your full deposit depends on the overall condition of the apartment and local rental laws.
Can Fixtman Match My Exact Apartment Paint Color?
Yes, Fixtman professionals can match paint colors using advanced color matching tools and samples.
What if the Hole is Bigger Than My Patch Kit?
For holes larger than 6 inches, contact a professional who can assess and recommend the best repair method.
How Long Should I Wait Before Painting Over Spackle?
Wait at least 1 to 3 hours for spackle and 12 to 24 hours for joint compound before priming and painting.
Can I Fill Holes if the Wall Has Wallpaper?
No, remove wallpaper first, repair the wall underneath, then decide if you want to replace the wallpaper or paint.
Should I Use Oil or Latex Paint for Wall Mount Repairs?
Use the same paint type as your walls; if unsure, latex is the most common choice for apartment walls.
What’s the Difference Between Spackle and Joint Compound?
Spackle is faster drying and better for small holes; joint compound works better for larger repairs and blending.