
Setting up a trampoline may look simple, but using the right tools makes a huge difference in safety, stability, and ease of assembly. Whether you are assembling a trampoline for the first time or taking it apart for storage or moving, having the correct equipment ensures a smoother and more secure experience. This guide covers the essential tools needed for trampoline assembly, their purpose, helpful setup tips, and common mistakes to avoid for long-lasting performance and safety.
Why the Right Tool Matters for Setup
Using the right tools for the setup of a trampoline ensures
- Safety: Using spring pullers protects hands and ensures an even stretch
- Efficiency: A power drill can save a significant amount of trampoline installation time
- Effectiveness: Rubber mallets prevent hardware frame coating from dents.
In short, each tool used during the setup serves an important purpose, regardless of whether its small item like safety gloves or a piece of machinery like a power drill.
Essential Tools for Assembly and Their Purpose
Assembling a trampoline together requires a few basic tools that might be in your garage or home already. Here is a brief breakdown of the essential tools and why you need them.
Spring Puller
If you get only one speciality tool, make it a spring puller. A spring puller gives you the right leverage to stretch the mate evenly, so each spring clicks in smoothly. Stretching trampoline springs by hand is asking for pinched skin and off-balance mat tension.
Gloves
Safety gloves protect your hands from blisters while pulling springs and avoid scrapes from the metal frame. Several folks wish they’d grabbed sturdy work gloves before pulling springs or pressing frame tubes into place. You’ll want these later, too. The same gloves protect your hands during seasonal checks when you re-tension bolts or replace a pad.
Rubber Mallet
Rubber mallets are essential for gently tapping metal poles and brackets into place without scratching or denting the protective coating. Regular hammers can dent the metal frame and ring. If you ever wonder what size mallet to use, go with a medium-weight one that fits comfortably in your hand.
Level and Measuring Tape
If your trampoline isn’t level, you’re setting yourself up for uneven bounce and unnecessary frame stress. Always use a level to check your surface. If you’re dealing with slope yard, consider using leveling blocks instead of digging up half your backyard.
Power Drill
A cordless power drill with a Phillips head bit will drastically speed up a trampoline assembly by quickly driving bolts and net hardware. However, do not use it to force screws, as overtightening can strip metal holes or crack plastic leg caps. Always finish the final tightening manually.
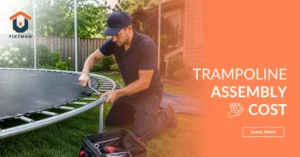
READ ALSO: Trampoline Installation Cost 2026
Helpful Add-ons and Tips
Safety Anchor Kit
If you live in an area prone to high winds or you want your trampoline to stay firm in your yard, then you can use heavy-duty safety anchors to stake it into the lawn. This will ensure that your trampoline will stay firm and steady.
A Stool or Rug
Installing a trampoline can take a couple of hours, so you should keep a portable stool or a rug with you to kneel and save your knees.
Manual Check
Always follow the manufacturer’s instructions given in the manual. Straying away from the directions of the manufacturer can lead to an unstable and uneven trampoline. So, for better results, follow the manual to get to know about every part that comes in the package, to know what goes where.
Tools for Disassembly and Ongoing
To disassemble a trampoline, you will need the tools used for assembly, along with wrench sets and pliers.
- Wrench sets are required to unscrew the bolts securing the trampoline’s legs, safety net poles, and top frame ring
- Pliers are great for twisting or pulling out tangled elastic straps, stubborn safety net ties, or bent pins
- Spring puller (T-Hook) is essential for safely unhooking the springs without pinching your fingers
- Zip-Lock Bags and tape are used to tape any loose bolts, nuts, and screws directly to their respective frame pieces or place them in sealed bags so you don’t lose hardware during a move
Top Issues and How to Avoid Them?
Wrong tools damage the parts
It’s easy to grab a hammer from the garage and start pounding the frame, but this is how you dent the metal ring and frame of the trampoline. Always use a rubber mallet and gently tap it on the required spots to fix the parts together.
Pinched fingers on springs
It is the biggest fear of first-time users to pinch their fingers with springs. They pull the springs bare-handed, resulting in blisters and pinched skin. To avoid this make sure to wear gloves and use spring pullers, which will result in an even stretch and safe hands.
Overuse or misuse of power tools
Using power drills or impact drivers for every step often leads to stripped screw heads, cross-threaded bolts, or bent metal frame components. Use hand tools like an adjustable wrench or Allen keys for the majority of the build.
Missing Hardware
Missing parts delay the project. Lay everything out on a tarp at the start, check it against the owner’s manual, and set aside extras where you won’t lose them in the grass.
READ ALSO: How to Choose the Strongest Wooden Playset Construction Materials
Conclusion
For the safest and most reliable trampoline setup, using designated tools for each step is crucial. Proper equipment ensures an even, stable, and steady installation while minimizing the risk of future structural failure. Always use the specialized tools mentioned on the manual or the manufacturer’s directions to achieve your goals of stability and longevity.
Frequently Asked Questions
Can I assemble a trampoline without gloves?
It’s possible, but not recommended. Gloves protect your hands from sharp metal edges, scrapes, blisters, and pinched skin while handling springs and frame parts.
Is a power drill necessary for trampoline setup?
No, a power drill is optional. It can speed up assembly, but overusing power tools may strip screws or damage the frame. Hand tools are safer for most steps.
How do I make sure my trampoline is level?
Use a measuring tape and a level before installation. Setting the trampoline on uneven ground can cause frame stress and uneven bouncing.
Can one person assemble a trampoline alone?
Small trampolines may be assembled by one person, but larger trampolines are safer and easier to assemble with at least two people.
How often should I check trampoline hardware after installation?
Inspect bolts, springs, pads, and anchors every few months and after severe weather to ensure the trampoline remains stable and safe.