
Concrete walls are among the strongest surfaces you can use for mounting a television. Whether you’re installing a TV in a basement, apartment, garage, office, or newly built home, concrete provides exceptional structural support that can safely hold even large flat-screen televisions when the installation is done correctly.
This guide explains everything you need to know about mounting a TV on a concrete wall. You’ll learn how to choose the right mounting bracket, select the proper anchors, drill safely into concrete, and avoid the common mistakes that can compromise your installation.
How Do You Mount a TV on a Concrete Wall? Step-by-Step Guide
Once you’ve selected the right location, gathered your tools, and purchased a compatible wall mount, you’re ready to begin the installation. Concrete is extremely durable, but it requires careful preparation and precision. Rushing any step can lead to damaged hardware, oversized holes, or an unstable mount.
Follow these steps to achieve a safe and professional-looking installation.
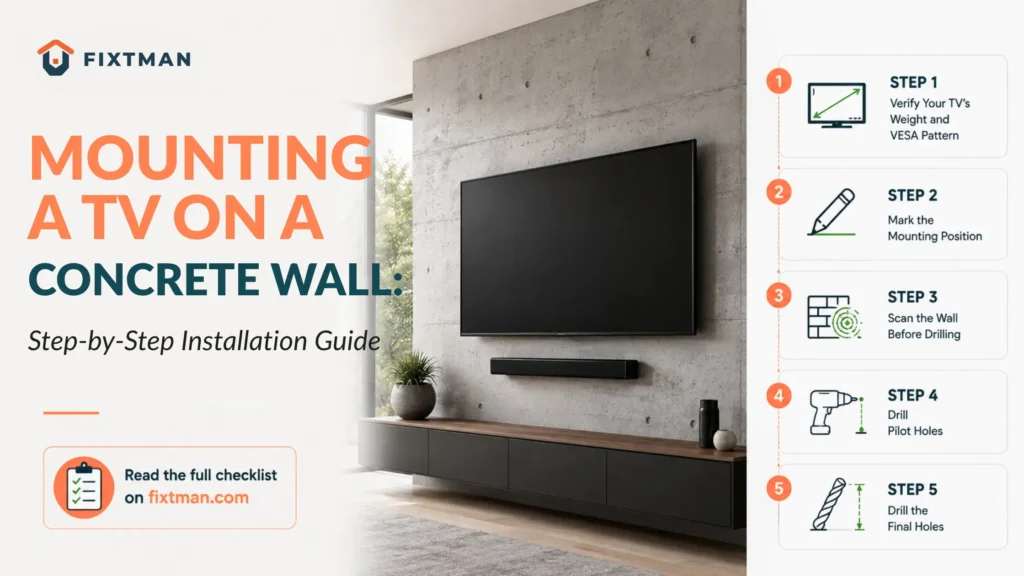
Step 1: Verify Your TV’s Weight and VESA Pattern
Before drilling into the wall, confirm that your wall mount is compatible with your television.
Check:
- TV weight
- Screen size
- VESA mounting pattern
- Wall mount weight capacity
The VESA pattern is the standardized distance between the mounting holes on the back of the TV. Your mounting bracket must match this pattern exactly.
It’s also a good idea to choose a mount with a higher weight capacity than your television to provide an additional safety margin.
Step 2: Mark the Mounting Position
Proper planning helps prevent unnecessary holes in your concrete wall.
Measure the desired viewing height and mark the center point of the installation area using a pencil or masking tape.
Hold the wall plate against the wall and use a spirit level to ensure it is perfectly horizontal before marking every drill hole.
Installation Checklist
Before drilling, confirm that the TV is centered on the wall and positioned at a comfortable viewing height. Also, consider furniture placement, ensure nearby electrical outlets are accessible, leave enough space for proper ventilation, and make sure the mount will not interfere with windows, doors, or shelving. Taking a few extra minutes during this stage can save significant time later.
Step 3: Scan the Wall Before Drilling
Although concrete walls do not contain wooden studs, they may contain hidden utilities. Use a wall scanner capable of detecting:
Electrical Wiring
Avoid drilling near electrical conduit or live wiring.
Plumbing Pipes
Accidentally drilling into water pipes can result in expensive repairs.
Metal Reinforcement (Rebar)
Many concrete walls contain steel reinforcement bars. Drilling directly into rebar can damage both your drill bit and the wall structure. If rebar is detected, adjust the mounting location slightly whenever possible.
Step 4: Drill Pilot Holes
Concrete requires patience during drilling, so start by using a smaller carbide-tipped masonry bit to create pilot holes at each marked location.
Pilot holes help keep the larger drill bit centered, improve drilling accuracy, reduce wandering, and minimize stress on the masonry bit during installation. Allow the hammer drill to do the work rather than forcing it into the wall.
Step 5: Drill the Final Holes
Replace the pilot bit with the masonry bit recommended for your anchor size. Maintain steady pressure while drilling straight into the wall.
Avoid changing the drill angle midway through the hole, as this can enlarge the opening and reduce anchor strength.
How Deep Should You Drill?
Each anchor manufacturer specifies the required drilling depth. As a general rule, drill approximately half an inch deeper than the anchor length so it seats fully inside the concrete.
A simple trick is to wrap masking tape around the drill bit at the desired depth. When the tape reaches the wall, you’ll know you’ve drilled far enough.
Step 6: Remove Concrete Dust
Concrete dust can prevent anchors from gripping securely, so it’s important to clean each hole before installation. Vacuum the hole to remove loose debris, blow out any remaining dust with compressed air, and use a small cleaning brush if needed to ensure a clean, secure fit for the anchors.
Never skip this step. Even a small amount of dust can reduce the anchor’s holding strength.
Step 7: Install the Concrete Anchors
Insert each anchor into its corresponding hole. Use a rubber mallet or hammer to tap the anchors gently until they sit flush with the wall surface. Never force an anchor into an undersized hole.
If an anchor does not fit properly, verify the hole diameter before continuing. Properly seated anchors are essential for supporting the weight of your television safely.
Step 8: Secure the Wall Plate
Position the mounting plate over the installed anchors. Insert all mounting bolts loosely before tightening any of them completely.
Gradually tighten each bolt using a socket wrench, alternating between bolts to distribute pressure evenly across the bracket. Once tightened, use a level to verify that the wall plate remains perfectly straight.
A small alignment error becomes much more noticeable after the television is mounted.
Step 9: Attach the Mounting Rails to the Television
Most TV wall mounts include two vertical rails that attach directly to the back of the television. Use only the screws recommended by the TV manufacturer or supplied with the mounting kit.
Before tightening the mount, verify that the mounting rails are properly aligned and install any required spacers. Confirm that the screws are the correct length to avoid damaging the TV, and make sure the ventilation openings remain unobstructed to prevent overheating. Overtightening screws can damage the threaded inserts on the back of the television.
Step 10: Lift and Mount the Television
Large televisions should always be lifted by two people. One person should support each side of the TV while carefully aligning the mounting rails with the wall bracket.
Lower the television slowly until the rails fully engage with the wall mount. Once mounted, engage any locking clips or safety screws provided with the bracket. These features help prevent accidental lifting or movement
Step 11: Test the Installation
Before reconnecting your devices, carefully inspect the installation. Verify that:
- The bracket sits flush against the concrete.
- Every anchor is fully tightened.
- The television is level.
- The locking mechanism is engaged.
- There is no movement when gentle pressure is applied.
If you notice any instability, remove the television and inspect the mounting hardware before proceeding.
Why Is Concrete an Excellent Surface for Mounting a TV?
Concrete is one of the strongest building materials used in homes and commercial buildings. Unlike drywall, which depends on wall studs for support, solid concrete spreads the TV’s weight across the entire wall. This makes it a safe and reliable surface for mounting televisions of almost any size.
Strong Weight Support
Concrete can easily hold the weight of most TVs when the correct anchors and mounting hardware are used. This makes it a great choice for both small and large televisions.
Long Lasting Durability
Concrete does not weaken or shift easily over time. A properly installed TV mount can stay secure for many years with very little movement.
Better Stability
A concrete wall provides a firm and stable base for your TV. This helps reduce movement and keeps the television securely in place.
Safer for Large TVs
Heavy and oversized TVs are better supported on concrete than on drywall. The solid surface offers extra strength for larger screens.
Lower Risk of Anchor Failure
Concrete holds masonry anchors much more securely than drywall. This reduces the chance of the mount pulling away from the wall when installed correctly.
Requires the Right Tools
Although concrete is very strong, it is also hard to drill into. You will need a hammer drill, masonry drill bits, and concrete anchors to install the TV mount safely and securely.
How Is Mounting on Concrete Different From Drywall?
Many homeowners think mounting a TV is the same on every wall, but concrete requires a different approach. Standard drill bits are not strong enough for concrete and can become dull or break. Instead, use carbide tipped masonry drill bits or SDS drill bits to drill safely and create secure mounting holes.
What Tools Do You Need Before Mounting a TV on Concrete?
Using the proper equipment makes installation easier, safer, and much more accurate.
Essential Tools
Gather these items before you begin:
- Hammer drill
- Carbide-tipped masonry drill bits
- Concrete anchors
- TV wall mount
- Socket wrench
- Measuring tape
- Spirit level or laser level
- Pencil or masking tape
- Vacuum or compressed air
- Safety glasses
- Hearing protection
- Dust mask
- Work gloves
- Ladder (if needed)
A hammer drill is strongly recommended because its hammering action breaks through concrete much faster than a standard drill while reducing wear on the drill bit.
Which TV Mount Is Best for a Concrete Wall?
The best TV mount for a concrete wall depends on where your TV is installed and how you watch it. Concrete is a strong surface, so it can safely support different types of TV mounts when the right anchors and hardware are used.
Fixed TV mount
A fixed TV mount keeps the TV close to the wall for a clean and modern look. It is a great choice for living rooms, bedrooms, home offices, and entertainment rooms where the viewing angle does not need to change.
Tilting TV mount
A tilting TV mount lets you angle the TV downward for better viewing. It helps reduce glare from windows and lights, making it a good option for high wall installations, bedrooms, and TVs mounted above furniture.
Full motion TV mount
A full motion TV mount can extend, tilt, and swivel in different directions. It is ideal for corner setups, large rooms, and spaces with more than one seating area.
Since a full motion mount moves away from the wall, it puts more pressure on the mounting hardware. Always use strong concrete anchors and choose a mount that can support more than your TV’s weight for a safe and secure installation.
READ ALSO: How to Mount a TV on a Brick Wall Safely
Which Concrete Anchors Should You Use?
Selecting the correct anchors is one of the most important decisions you’ll make during the installation.
Expansion Anchors
Expansion anchors expand inside the concrete as the bolt is tightened, creating a strong mechanical grip. They are commonly used for medium and large televisions.
Concrete Sleeve Anchors
Sleeve anchors distribute pressure over a larger surface area, making them an excellent choice for TV wall mounts. They’re easy to install and work well in solid concrete.
Wedge Anchors
Wedge anchors provide exceptional holding strength for heavier televisions. Because they expand aggressively inside the concrete, they’re often recommended for larger installations and full-motion brackets.
Concrete Screws
Concrete screws are another reliable option for lighter televisions. They install quickly and can often be removed more easily than expansion anchors if the mount needs to be relocated later.
- VESA mounting pattern
- Wall mount weight capacity
The VESA pattern is the standardized distance between the mounting holes on the back of the TV. Your mounting bracket must match this pattern exactly.
It’s also a good idea to choose a mount with a higher weight capacity than your television to provide an additional safety margin.
What Mistakes Should You Avoid When Mounting a TV on a Concrete Wall?
Even though concrete is one of the strongest building materials, installation mistakes can still affect the safety of your TV mount. Avoiding these common errors will help keep your television secure for years.
Using the Wrong Drill Bit
Concrete should only be drilled with carbide tipped masonry drill bits or SDS drill bits. Standard wood or metal drill bits can wear out quickly, break, or create poor quality holes. Always use masonry drill bits, replace worn ones before starting, and use a hammer drill for the best results.
Choosing the Wrong Anchors
Regular drywall anchors are not strong enough for concrete walls. Instead, use concrete anchors such as sleeve anchors, wedge anchors, expansion anchors, or concrete screws. Make sure both the anchors and the TV mount can safely support your television’s weight.
Drilling Holes That Are Too Large
Drilling oversized holes can stop the anchors from gripping the concrete properly. Always use the drill bit size recommended by the anchor manufacturer and drill straight into the wall without moving the drill from side to side.
Forgetting to Remove Concrete Dust
Dust left inside the drilled holes can prevent the anchors from holding securely. After drilling, clean each hole by vacuuming or blowing out the dust. A clean hole creates a stronger and safer installation.
Mounting the TV Too High
Installing the TV too high can make watching uncomfortable and cause neck strain. For the best viewing experience, place the center of the screen at about seated eye level unless your room requires a higher position.
Ignoring Cable Planning
Planning your cables after mounting the TV can leave wires visible and make installation more difficult. Decide where your power cables and devices will go before drilling so everything looks neat and organized.
Should You Mount the TV Yourself or Hire a Professional?
Concrete walls are highly suitable for TV mounting, but not every installation is ideal for a DIY project.
DIY Installation Is a Good Option If:
You can mount a TV on a concrete wall yourself if you have the right tools and some basic DIY experience. A hammer drill is needed to drill into concrete, and the wall should be solid and free from cracks or damage. Make sure your TV is within the weight limit recommended for the mount. It is also important to have another person help you lift and hold the TV during installation. Doing the job yourself can save money and lets you place the TV exactly where you want it.
Consider Hiring a Professional If:
Hiring a professional is a better option if your TV is 75 inches or larger, you want hidden cables, or your concrete wall may contain rebar or other utilities. It is also recommended for commercial installations or if you are not confident drilling into concrete. Professional installers have the right tools and experience to complete the job safely and often much faster.
How Much Does It Cost to Mount a TV on a Concrete Wall?
The overall cost depends on whether you complete the project yourself or hire an experienced installer.
| Item | Estimated Cost |
| TV Wall Mount | $ 40-$ 250 |
| Concrete Anchors | $ 15-$ 40 |
| Masonry Drill Bits | $ 20-$ 60 |
| Hammer Drill Rental | $ 30-$ 60 per day |
| Cable Management Kit | $ 20-$ 80 |
| Professional Installation | $ 150-$ 450+ |
While DIY installation can reduce labor costs, investing in high-quality hardware is essential for long-term safety and stability.
How Can You Keep Your TV Mount Secure?
Proper maintenance helps ensure your television remains safely mounted long after installation.
Inspect the Mount Regularly
Every six to twelve months, inspect:
- Mounting bolts
- Concrete anchors
- Wall plate
- Locking clips
- Cable condition
If you notice movement or loose hardware, tighten the fasteners according to the manufacturer’s instructions.
Keep the Area Clean
Dust and debris can accumulate behind the television over time. Cleaning the area periodically also provides an opportunity to inspect the mounting hardware for signs of wear or corrosion.
Avoid Overloading the Mount
Do not attach shelves, speakers, or accessories to the TV mount unless they are specifically designed to support additional weight. Adding excessive weight can reduce the mount’s safety margin.
Conclusion
Mounting a TV on a concrete wall is a secure and long-lasting solution when you use the right tools, anchors, and installation techniques. Careful planning and proper installation will ensure your TV remains safely mounted for years.
If you want a hassle-free installation, Fixtman is here to help. Our experienced technicians provide professional TV mounting services, ensuring your television is installed safely, securely, and at the perfect viewing angle. Contact Fixtman today for reliable, expert installation.
Frequently Asked Questions
Can you mount a TV directly to a concrete wall?
Yes. Concrete is one of the strongest surfaces for mounting a television when the correct anchors and installation methods are used.
Do you need a hammer drill?
Although a heavy-duty drill may work for small projects, a hammer drill is strongly recommended because it drills through concrete much faster and with less effort.
What anchors are best for concrete walls?
Sleeve anchors, wedge anchors, concrete expansion anchors, and concrete screws are all excellent choices, provided they are properly sized for the television and mounting bracket.
Can concrete support a large TV?
Yes. Properly installed concrete anchors can safely support large televisions, including many 75-inch and larger models.
How long does installation take?
Most homeowners complete a concrete wall TV installation in two to four hours, depending on the TV size, wall condition, and experience level.
Can I hide the cables?
Yes. Surface-mounted cable raceways are the simplest solution, while concealed cable routing inside concrete walls generally requires conduit installation and may be best handled by a professional.
How often should I inspect the mount?
Inspect the installation at least twice a year and after adjusting a full-motion bracket to ensure all hardware remains secure.
Can I remove the mount later?
Yes. Most concrete anchors can be removed or cut flush with the wall if the mount is no longer needed. Any remaining holes can typically be repaired using a concrete patching compound.